Now, if you want to refine it even further, why not try this:
[code]sudo lshw -short | grep network[/code]
[code]man lshw[/code]
or
[code]info lshw[/code]
How To: Time a Command
Have you ever wanted to know how long it takes to complete a command that you entered in the Linux terminal? Well, wonder no more!
[code]ls -la[/code]
time‘ command before it. Time is simply described in the man page as:
[code]time ls -la[/code]
Note how it tells you the time beneath the results and, if you want to try something bigger, you can take a look at this command:
The output at the end is something like this:
real 0m0.566s user 0m0.423s sys 0m0.143s
Let’s Spin up a Quick Python Server!
What to do? What to do?
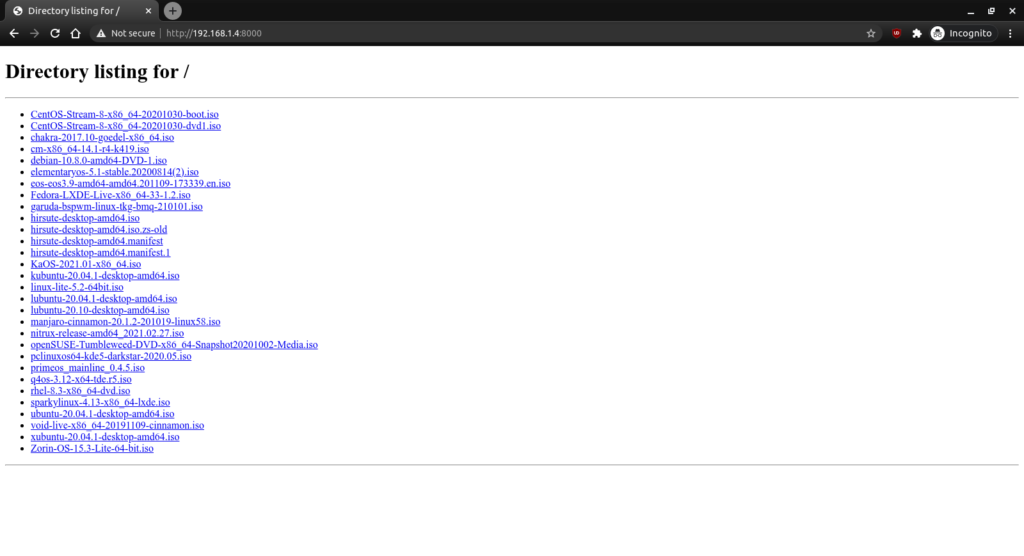
SSH (secure shell) enabled on your desktop (in this scenario) and that you know how to use it. So, it’s with a giant assumption and a leap of faith when I say that you’ve successfully used SSH to get to your desktop and you’ve already navigated to the directory where this latest and greatest distro image resides.
SCP (secure copy protocol) if you wanted. That’s all well and good, but darn it we’re aiming for the most contrived situation possible just so I can tell you how to spin up a server with Python! So, for whatever reason, you’re hellbent on doing this in your browser. And do this in your browser you shall!
contribute to the site!
[code]python -V[/code]
[code]python -m SimpleHTTPServer[/code]
[code]python3 -m http.server[/code]
[code]ip.address.of.desktop:8000[/code]
See? No IP address required! You can also use this for the above mentioned SSH!
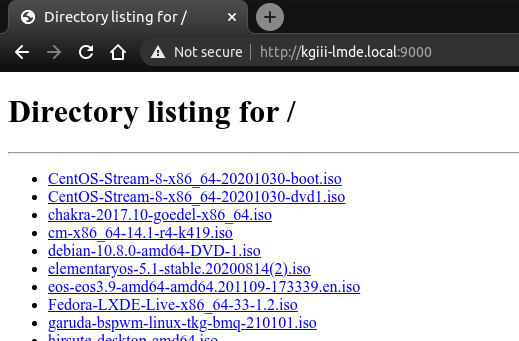
Now, if you want to do so, you can also change the port number. This is the same for both commands. In both cases, just add your chosen port number at the end. Like so:
[code]python3 -m http.server 9000[/code]
And, again, it should look a bit like this:
Note the changed port number. You should probably avoid reserved ports.
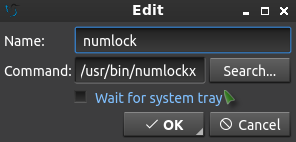
Next, open your applications menu, click on Preferences, click on LXQt settings, and then click on Session settings.
Once you have that open, click on Autostart (on the left) and then Add (on the right). Once that is open, give our numlock a name and enter the following command: