How To: Enable x11 Forwarding with SSH
Just to quickly clear up a misconception, x11 forwarding works just fine with Wayland. Way back in the earliest days, it was agreed that it should retain backwards compatibility with x11 forwarding.
Enable x11 Forwarding With SSH
What is this strange thing, this x11 forwarding?
Perhaps a picture is in order. Check this:
So, how do you do it?
Well, first you need to crack open your terminal. To do that, you just press CTRL + ALT + T on your keyboard and your default terminal emulator will open.
Now, in said terminal, I want you to run the following command:
[code]sudo nano /etc/ssh/sshd_config[/code]
Once you have that open, you just need to remove the appropriate asterisk (uncomment it out) for the right line. Look for the line that says:
[code]#X11Forwarding yes[/code]
And change it to:
[code]X11Forwarding yes[/code]
Then save the file by pressing CTRL + X, then Y, and then ENTER.
[code]systemctl restart sshd[/code]
[code]ssh user@host_name.local -X[/code]
To try to make sense of that, if I were to do this connecting to the new MSI laptop, then my command would look just like:
[code]ssh kgiii@kgiii-msi.local -X[/code]
You can also use the IP address, instead of the hostname, just like we discussed in the previous article about SSH. To do that, it looks like this:
[code]ssh user@ip_address -X[/code]

how to use ‘dpkg’ to get a list of installed applications. It was a pretty simple command. Now, you could try this: [code]cat Documents/installed_apps.txt | grep ii | wc -l[/code] cat‘ stands for concatenate. It has been around since pretty much Unix v. 1. It basically reads a file and spits out the content. The man page describes it as thus: See? Pretty simple. [code]dpkg -l | grep ii | wc -l[/code] pipe. You’ll see it fairly often. It’s used to take the commands from one command and use them in another. It goes back to the philosophy of ‘hiding the internals’, with the goal being simplicity and clarity. But, you never have to make the text file to perform this counting exercise. Let’s Count the Installed Packages!
How To: Check CPU Temperatures
This one should be fairly short and straightforward. Once again, crack open your favorite terminal emulator with CTRL + ALT + T.
lm-sensors. Wikipedia helpfully describes it as thus:
lm_sensors (Linux-monitoring sensors) is a free open-source software-tool for Linux that provides tools and drivers for monitoring temperatures, voltage, humidity, and fans. It can also detect chassis intrusions.
It then promptly says that a citation is needed.
[code]sudo apt install lm-sensors[/code]
[code]sudo sensors-detect[/code]
[code]sensors[/code]
If you are easily startled by the metric system, you can just add the -f switch for Fahrenheit, like so:
[code]sensors -f[/code]
So many questions are answered by telling people to skip the snap version and to install the .deb/PPA versions. This is how you do that for Google Chrome and Chromium. Chrome and Chromium are browsers from Google and Chrome is based on Chromium but has more features inside it – and isn’t open source. Chromium is open source, and many other browsers are based on it. This, like many of my articles, is going to be fairly limited in scope. It’s only really useful if you’re using Debian derivatives like Ubuntu, ElementaryOS, or Mint. In fact, part of it will only apply if you’ve enabled PPAs on your computer. PPA, if you’re curious, stands for Personal Package Archive. Rather than beat a dead horse, I’ll just suggest that you visit this site to learn more about them. It should be noted that PPAs were initially meant for testing and many consider them to be a security risk because you’re essentially letting someone else decide what gets installed on your system without the oversight of the official project. Anyone can make a PPA and advertise it. Anyhow, back to the topic at hand. The process is different for both of them and so we’ll go ahead and get started with Chrome. Chrome: Chrome is going to be the easiest. Crack open your terminal with CTRL + ALT + T and enter the following: [code]cd Downloads Tada! You’re done. When you finish it up and start Chrome, you’ll get to set it as the default browser and stuff like that. On top of that, it will automatically update with the system – as it adds its own repository. Note, the new repository contains the beta version as well. Chromium: Chromium is a bit more complicated. For this one, you’ll need to add a PPA first. Once again, open your terminal with CTRL + ALT + T. Now, let’s add the PPA. [code]sudo add-apt-repository ppa:saiarcot895/chromium-beta[/code] Yes, I know it says beta. Also, any modern distro should do this for you, but you may need to first update the database of installable packages. [code]sudo apt update[/code] Once that’s done, or if you don’t need to do so, you can go ahead and install Chromium. [code]sudo apt install chromium-browser[/code] Then, much like with Chrome, you will have a regularly updated version of Chromium at your disposal. Like always, go ahead and subscribe to be notified of new articles. I promise, I won’t send you any spam or give your email addresses away. Install the non-Snap Version of Chrome/Chromium
wget https://dl.google.com/linux/direct/google-chrome-stable_current_amd64.deb
sudo apt install ./google-chrome-stable_current_amd64.deb[/code]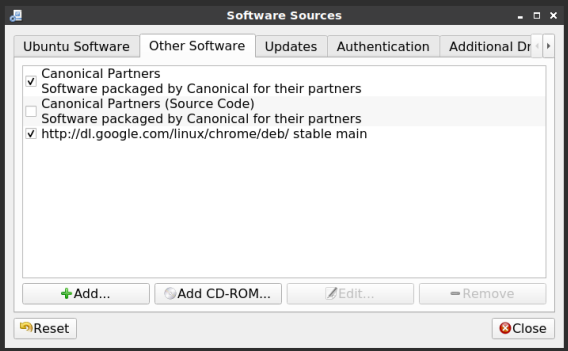
Put it all Together
This is just a quick article that may show one of the reasons I write this material. We’re just going to put together a couple of pages from this site in an example of real-world use.
So, if you remember, I told you how to use dpkg to get a list of installed applications. The command I used on that page was:
[code]dpkg -l > Documents/installed_apps.txt[/code]
Well, the output from that is more information than I really need. It looks like this:
[code]ii abiword 3.0.2-6 amd64 efficient, featureful word processor with collaboration
ii abiword-common 3.0.2-6 all efficient, featureful word processor with collaboration — common files
ii accountsservice 0.6.45-1ubuntu1.3 amd64 query and manipulate user account information
ii ack 2.22-1 all grep-like program specifically for large source trees[/code]
That’s plenty informative – but I want just the name of the applications. Sure enough, we can use ‘AWK‘ to do this.
On that page, we have this command:
[code]awk ‘{ print $2 }’ countries.txt > finished.txt[/code]
So, let’s mix the two together! We can do that!
Let’s see… I’ll obviously need to change the paths and file names. Coincidentally, I’ll not need to change the column (the bit about { print $2 }) because I still want the second column.
What does it end up looking like?
[code]awk ‘{ print $2 }’ Documents/installed_apps.txt > Documents/InstalledApps.txt[/code]
Now, navigate to your documents folder and open InstalledApps.txt with your favorite text editor. You’ll see that it looks a bit like this:
[code]abiword
abiword-common
accountsservice
ack[/code]
You’ll still have some unwanted text at the top of the page, but it works well enough to get the job done. It’s reasons like that which motivate me to write this material.