How To: Enable x11 Forwarding with SSH

In the last article, I explained how to enable SSH. In today’s article, we’re going to learn how to forward GUI application windows with SSH. x11 forwarding is easy and beneficial.

Just to quickly clear up a misconception, x11 forwarding works just fine with Wayland. Way back in the earliest days, it was agreed that it should retain backwards compatibility with x11 forwarding.

Enable x11 Forwarding With SSH

What is this strange thing, this x11 forwarding?

Well, when you’re connected to another computer via SSH you can use the terminal to control the computer. That’s great, but what if you want to use a GUI application? Sure, you could set up some sort of remote desktop application, such as VNC. Or, alternatively, you can just forward graphic applications over SSH. It’s remarkably easy!

Perhaps a picture is in order. Check this:
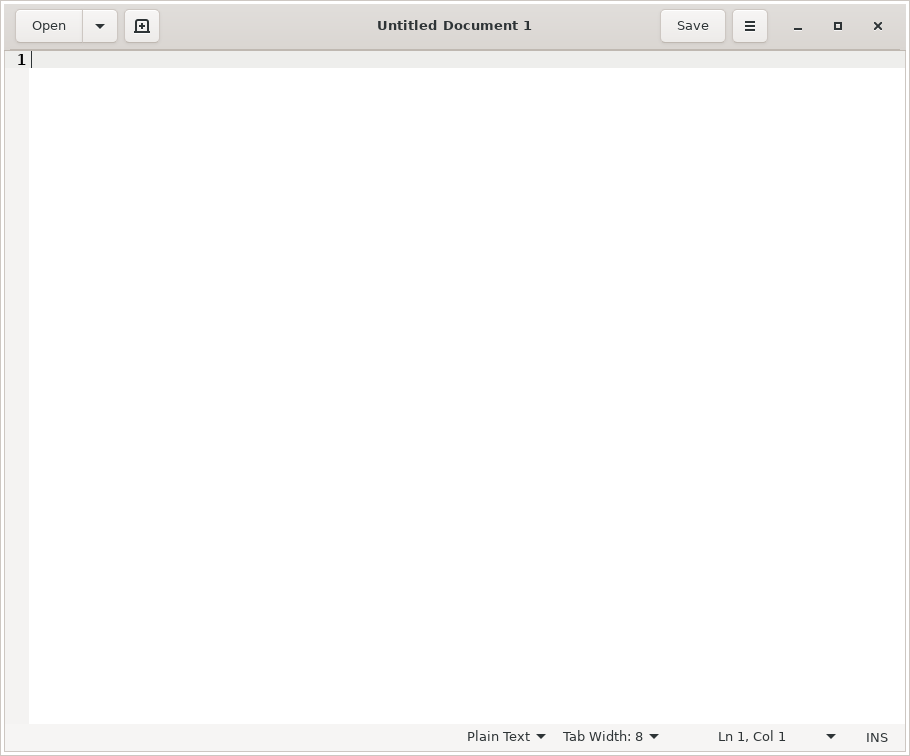
x11 forwarded gedit
This GEdit is actually running on my laptop, forwarded to this desktop.

That’s right. That’s running on my laptop. I’ve just forwarded the GUI application to this computer. If I write something and save it, it’d be saved on the computer that I’m connected to and not the computer that I’m using.

Amusingly, I used this just earlier today. I had to move a complex password to my laptop and I was being lazy. See? It comes in handier than you might think. Okay, I could have easily used nano, but I wanted to make sure that I’d configured x11 forwarding properly and get a screenshot.

So, how do you do it? 

Well, first you need to crack open your terminal. To do that, you just press CTRL + ALT + T on your keyboard and your default terminal emulator will open.

Now, in said terminal, I want you to run the following command:

Once you have that open, you just need to remove the appropriate asterisk (uncomment it out) for the right line. Look for the line that says:

And change it to:

Then save the file by pressing CTRL + X, then Y, and then ENTER.

Next up, you’ll need to restart the SSH service and that’s done with:

And that’s it. You can now use x11 forwarding over SSH. To do so, you just need to add the -X switch.

To try to make sense of that, if I were to do this connecting to the new MSI laptop, then my command would look just like:

You can also use the IP address, instead of the hostname, just like we discussed in the previous article about SSH. To do that, it looks like this:

Once you’re there, just go ahead and start an application. For example, open gedit by typing just that. You may find some applications won’t work, often due to ownership and permissions, but you’ll find many that do. If you find one that doesn’t work, you can always check any errors thrown and work to resolve the issue.

See? Note the carefully drawn arrow that shows where it was forwarded from. Tada!

That’s an example of Firefox forwarded over SSH using x11 forwarding and you may notice the washed out look. I haven’t really dug into it, but I am reasonably confident that it’s because of compression. I’ve never needed to dig into that and, amazingly enough, I don’t know everything and don’t see any reason to invest time learning about it any further. You get what I know, not what I am able to learn! (You’re welcome!)

Anyhow, there you have it. One more article in the books and one more bit of knowledge plastered across the internet. If you found the article useful, you could use that rating button. I kinda use those ratings to decide what to write. You can also sign up for the newsletter. I had to remove some @gmx.com email address because they simply don’t let my emails through. (I’ve never sent a single unsolicited message, it’s just a horrible ccTLD and it gets filtered often.) Sign up again with a different email address. Thanks for reading!

Smash a Button
[Total: 2 Average: 4.5]
About Me: I'm just some retired dude with a little bit more free time on my hands. If you want to support the site, why not help yourself out too by ordering some inexpensive web hosting so that you can start your own site?


Let’s Count the Installed Packages!

Have you ever wanted to know how many packages you’ve installed? It’s actually a really simple process. I’ll show you!

This is only useful if your distro uses ‘dpkg’, which is actually quite a few distros. If you remember correctly, I’ve previously told you how to use ‘dpkg’ to get a list of installed applications. It was a pretty simple command.

Well, so isn’t this a simple command.

Like pretty much every time, let’s get that terminal opened up. (CTRL + ALT + T)

Now, if you’d followed the above link’s directions, you’d have a file called ‘installed_apps.txt’ and it would be in your Documents directory. If you open that file, you’ll see that not all the lines are actually installed applications. There are some lines that contain data that isn’t an installed application.

But, if you look carefully, you’ll see that the lines with the applications all begin with ‘ii’. We can use that to make our work more accurate.

Now, you could try this:

If you’re curious, ‘cat‘ stands for concatenate. It has been around since pretty much Unix v. 1. It basically reads a file and spits out the content. The man page describes it as thus:

cat – concatenate files and print on the standard output

See? Pretty simple.

Next, you’re telling it which file to work on (installed_apps.txt in the Documents directory). Then you’re telling it to look for the letters ‘ii’ and to count the lines that contain them. 

Note: In some cases, this will not be 100% accurate. If you have something installed with ‘ii’ in the name then it will count that as well. However, the goal here isn’t actually 100% accuracy, the goal here is to help you get familiar with some of these terminal commands.

So, what if you haven’t followed along and don’t actually have that file? Can you still do this? Absolutely! Watch this:

To be a bit more clear, that little ‘|’ character is called a pipe. You’ll see it fairly often. It’s used to take the commands from one command and use them in another. It goes back to the philosophy of ‘hiding the internals’, with the goal being simplicity and clarity. But, you never have to make the text file to perform this counting exercise.

Again, this command will give you an inaccurate result if you happen to have an application that has an ‘ii’ in the name. That’s fine. This is great for estimation and you really don’t need a hard number for anything. In a quick look, I have exactly zero apps with ‘ii’ in the name. So, in my case the count should be spot on. The goal is to help you get more comfortable in the terminal and get used to some of these commands. They’re surprisingly useful, even in day-to-day operations.

Like always, thanks for reading. If you want, you can sign up for the email newsletter. It’s over there, in the right sidebar. I promise, I won’t send you any spam, I won’t sell your email address, I won’t give your email address away, and I won’t send you pics of my dinner. So, sign up and be the first person on the block to read new articles!


Smash a Button
[Total: 0 Average: 0]
About Me: I'm just some retired dude with a little bit more free time on my hands. If you want to support the site, why not help yourself out too by ordering some inexpensive web hosting so that you can start your own site?


How To: Check CPU Temperatures

This is obviously about Linux and, given that it’s Linux, there are often multiple ways to accomplish things. This is one way to check the CPU temperatures.

This one should be fairly short and straightforward. Once again, crack open your favorite terminal emulator with CTRL + ALT + T.

For this exercise, we’ll be using lm-sensors. Wikipedia helpfully describes it as thus:

lm_sensors (Linux-monitoring sensors) is a free open-source software-tool for Linux that provides tools and drivers for monitoring temperatures, voltage, humidity, and fans. It can also detect chassis intrusions.

It then promptly says that a citation is needed. 

So, let’s check the man page. man lm-sensors has no entry, so you’ll need the slightly less obvious man sensors. In this case, the description is not much greater.

sensors is used to show the current readings of all sensor chips. sensors -s is used to set all limits as specified in the configuration file. sensors –bus-list is used to generate bus statements suitable for the configuration file.

Alright, so let’s get this installed. 

So far so good, but now we need sensors to find the hardware and that’s done with this:

That’s going to run and it’s interactive. You’ll need to type “YES” over and over again and then finally hit the ENTER button. But, once you’re done, it’s all over and you never have to do it again – unless you add/change hardware that has sensors.

Now that it’s installed, you can just run:

If you are easily startled by the metric system, you can just add the -f switch for Fahrenheit, like so:


Congratulations! You can now easily tell how hot (or cold) your CPU is running. You should also look up your CPU’s temperature thresholds. This way you’ll be able to tell if your CPU is running hotter than it should be running. Doing this can save your hardware or give it greater longevity.

The newsletter works again. You can now sign up and get notified of new articles. It’s painless, and I promise I won’t send you any spam –  nor give/trade your email address with anyone for any purpose. (Frankly, I have zero motivation to do so.) If you had signed up previously, you’ll need to do it again, for I am lazy and there was no export and import options. Thanks for reading! (Also, I hope you like the font change!)

Smash a Button
[Total: 1 Average: 5]
About Me: I'm just some retired dude with a little bit more free time on my hands. If you want to support the site, why not help yourself out too by ordering some inexpensive web hosting so that you can start your own site?


Install the non-Snap Version of Chrome/Chromium

So many questions are answered by telling people to skip the snap version and to install the .deb/PPA versions. This is how you do that for Google Chrome and Chromium. Chrome and Chromium are browsers from Google and Chrome is based on Chromium but has more features inside it – and isn’t open source. Chromium is open source, and many other browsers are based on it.

This, like many of my articles, is going to be fairly limited in scope. It’s only really useful if you’re using Debian derivatives like Ubuntu, ElementaryOS, or Mint. In fact, part of it will only apply if you’ve enabled PPAs on your computer.

PPA, if you’re curious, stands for Personal Package Archive. Rather than beat a dead horse, I’ll just suggest that you visit this site to learn more about them. It should be noted that PPAs were initially meant for testing and many consider them to be a security risk because you’re essentially letting someone else decide what gets installed on your system without the oversight of the official project. Anyone can make a PPA and advertise it.

Anyhow, back to the topic at hand. The process is different for both of them and so we’ll go ahead and get started with Chrome.

Chrome:

Chrome is going to be the easiest. Crack open your terminal with CTRL + ALT + T and enter the following:

Tada! You’re done. When you finish it up and start Chrome, you’ll get to set it as the default browser and stuff like that. On top of that, it will automatically update with the system – as it adds its own repository.

Note, the new repository contains the beta version as well.

Chromium:

Chromium is a bit more complicated. For this one, you’ll need to add a PPA first. Once again, open your terminal with CTRL + ALT + T.

Now, let’s add the PPA.

Yes, I know it says beta. Also, any modern distro should do this for you, but you may need to first update the database of installable packages.

Once that’s done, or if you don’t need to do so, you can go ahead and install Chromium.

Then, much like with Chrome, you will have a regularly updated version of Chromium at your disposal. Like always, go ahead and subscribe to be notified of new articles. I promise, I won’t send you any spam or give your email addresses away.


Smash a Button
[Total: 0 Average: 0]
About Me: I'm just some retired dude with a little bit more free time on my hands. If you want to support the site, why not help yourself out too by ordering some inexpensive web hosting so that you can start your own site?


Put it all Together

This is just a quick article that may show one of the reasons I write this material. We’re just going to put together a couple of pages from this site in an example of real-world use.

So, if you remember, I told you how to use dpkg to get a list of installed applications. The command I used on that page was:

Well, the output from that is more information than I really need. It looks like this:

That’s plenty informative – but I want just the name of the applications. Sure enough, we can use ‘AWK‘ to do this. 

On that page, we have this command:

So, let’s mix the two together! We can do that!

Let’s see… I’ll obviously need to change the paths and file names. Coincidentally, I’ll not need to change the column (the bit about { print $2 }) because I still want the second column. 

What does it end up looking like?

Now, navigate to your documents folder and open InstalledApps.txt with your favorite text editor. You’ll see that it looks a bit like this:

You’ll still have some unwanted text at the top of the page, but it works well enough to get the job done. It’s reasons like that which motivate me to write this material.

Smash a Button
[Total: 1 Average: 5]
About Me: I'm just some retired dude with a little bit more free time on my hands. If you want to support the site, why not help yourself out too by ordering some inexpensive web hosting so that you can start your own site?


Linux Tips

This work is licensed under a Creative Commons Attribution 4.0 International License.
SITEMAP
Exit mobile version