How To: Disable Sleep/Hibernation on Ubuntu Server

In an earlier article, I wrote about making my own router. I am currently using Ubuntu’s server release for this. Imagine my surprise when I discovered a server configured to sleep! 

Rather than try to figure out why a server would sleep by default, I’m just going to concentrate on fixing it. Seriously, though. Who decided to include all the sleep and hibernation underpinnings and decided they should be on by default? I can absolutely assure you that I did not turn them on!

*~grumbles~*

Seriously! My log contained lovely hints like:

Disable Power Management – Ubuntu Server

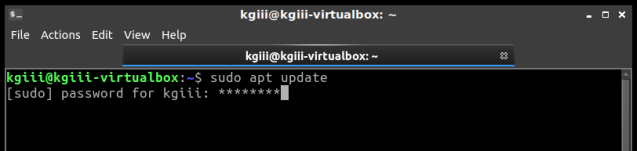
This time you probably don’t need to open a terminal. It’s a server! Use SSH and you’re already in a terminal! Sheesh!

Anyhow, to make sure that this doesn’t happen again, let’s go ahead and kill everything that has to do with suspend, sleep, or hybrid-sleep. It’s actually pretty easy.

Let’s start with ‘sleep.target’ and we’re going to just mask these rather than removing them. If we mask them, we can unmask them – should we ever feel the need to do so, though I can’t see why you’d want them with server applications.

Next, let’s take care of ‘suspend.target’ with:

Then we’ll take care of ‘hibernate.target’ with:

And, last but not least, we will go ahead and mask ‘hybrid-sleep.target’:

As alluded to above, you can undo any of those by simply changing ‘mask’ to ‘unmask’ in the commands above and it will re-enable them. Why you’d want to do that, I have no idea – just like I have no idea why these things would even be included in a server-specific release, never mind why any of them would be enabled!

If you’re feeling so inclined, you can verify they’re off. For example, ‘sleep.target’ can be checked with:

Finally, thanks for reading. Like always, I love the feedback and the newsletter is still there waiting for you to sign up. If you do sign up, I chose a pretty crappy domain name and you should probably check your spam inbox for the confirmation email.

Smash a Button
[Total: 1 Average: 5]
About Me: I'm just some retired dude with a little bit more free time on my hands. If you want to support the site, why not help yourself out too by ordering some inexpensive web hosting so that you can start your own site?


How To: Enable Numlock on Modern Lubuntu

At the time of writing, Lubuntu 18.04 is soon to be no longer supported. With the change to LXQt, many of the old tweaks no longer work and you’ll need to learn some new ways to do things. In this article, I’ll explain how to put numlock into its on position automatically with Lubuntu 20.04 and up.

First, we’re going to install ‘numlockx’ and that’s pretty easy. Start by using your keyboard to open the terminal with CTRL + ALT + T. (I really like that keyboard indicating layout feature!)

Now that you have that open, try the following:

Next, open your applications menu, click on Preferences, click on LXQt settings, and then click on Session settings.

Once you have that open, click on Autostart (on the left) and then Add (on the right). Once that is open, give our numlock a name and enter the following command:

(Don’t forget to click Ok to save it.) It should look a little like this:

See? This is a nice easy one!

And, that’s it. Reboot and it should work. I can’t really drag this out to making it a longer article. Sure, there are other ways to add something to autostart, but I see no reason to do this particular exercise any other way. Why add complexity when this just works out of the box?

Like always, thanks for reading. Don’t forget to sign up for the newsletter. Chances are that I’ll eventually cease posting at all the various forums (when the pandemic is over) so this will help you keep up with the site and keep in touch. Don’t worry, I won’t send you any spam.

Smash a Button
[Total: 0 Average: 0]
About Me: I'm just some retired dude with a little bit more free time on my hands. If you want to support the site, why not help yourself out too by ordering some inexpensive web hosting so that you can start your own site?


Manage Debian Repositories with a GUI

You can manage the repositories in Debian with the terminal just fine. It’s not very difficult, but you can also easily manage them with a GUI. Here’s how!

Debian is an operating system that is quite popular to build off. There are many derivatives and derivatives of derivatives. Debian first appeared on the scene in 1993 and is the parent of popular distros like Ubuntu – and so the grandparent of the many distros based on Ubuntu. I strongly suspect that more people use Debian derivatives than actually use Debian itself.

I’m going to assume that you have a brand new copy of Debian freshly installed. Furthermore, I’m going to assume that you only grabbed the first .iso of the lot. 

If the above is true, the first thing you’re going to need to do is get rid of the cdrom entries in your apt sources. If you try to install (or update) and have cdrom listed in your sources then you’ll bump into some errors. So, let’s deal with that first.

Start your terminal with the trusty CTRL + ALT + T.

Now, to fix that cdrom thing we’re going to need to edit your ‘sources.list’ file. To do that, we enter this in the terminal:

Find the line that starts with ‘cdrom’ and put a # in front of it to comment it out. It should look a bit like this:

That’s opened after editing. Your version may look different.

Now, go ahead and save it. Seeing as we’re using nano, you do that pressing CTRL + X, then Y, and then ENTER.

At this point, we need to make sure the system knows we made that change. So, we’re going to update the lists of software available with this:

That shouldn’t take all that long, especially if it’s a new installation and the software was updated during the install. So, our final steps in the terminal are these:

Pound on the enter key, type your password if asked, and pound on the enter key again after entering the ‘y’ response if asked.

That’s it. You’re done. If you look in your menu, you should see a new entry called “Software & Updates”. Root around in the tabs and revel in your new tool to manage repos and a few other things.

See? Mission accomplished and it wasn’t even all that painful! Congratulations!

As always, thanks for reading. It’s truly appreciated. I check my stats most every day and have been enjoying seeing them trend upwards. The site is actually starting to get indexed and will hopefully be a repository of information for years to come.

Don’t forget to sign up for the newsletter. I’ll only send you automatic updates when there’s something published (or meta stuff concerning the site). I shan’t spam nor sell your email address. In fact, odds are good that I won’t even look at your email address, for I am a lazy and disinterested man. Have a great day!

Smash a Button
[Total: 1 Average: 5]
About Me: I'm just some retired dude with a little bit more free time on my hands. If you want to support the site, why not help yourself out too by ordering some inexpensive web hosting so that you can start your own site?


How To: Make Ubuntu Show Asterisks When Typing Password

By default, Ubuntu doesn’t show anything when you enter your password in the terminal. This is for security reasons. Someone shoulder-surfing won’t be able to see the number of characters in your password. This is how to get some feedback when you enter your password in the terminal.

This one is pretty easy and shouldn’t take very long. First, let’s open your terminal. Press CTRL + ALT + T and your default terminal should open. Yay!

Now, we need to edit the sudoers file. It’s done like this:

Enter your password and hit enter, of course. (This will be the last time you enter your password in the terminal without some sort of visual feedback!)

Now it gets a little tricky. 

Use the down arrow until your at the start of the line that says:

Press the ENTER button. This should move that line down and leave a blank line above it. Use the arrow button to move up to that blank line and enter:

Then press the TAB button on your keyboard. This will move the cursor to the right location. Add this text:

The entire line should look something like:

Note: This spacing isn’t really required so much as it is done for convention and to aid in ease of reading/processing information-dense text more accurately and swiftly. If you want to be diligent, you can even leave a comment, prefaced with a #, remarking that you made a change and why you made a change. Comments should be on their own lines.

Anyhow…

Now, you simply need to save the file. If you’ve been following along, you’ll already know how to do that. If not, here it is again:

Press CTRL + X, then Y, and then ENTER.

Congrats, you’re done! You may need to close and reopen your terminal to notice the difference. Test it by opening a new terminal window and tying in:

Type your password when prompted and you’ll hopefully see some asterisks as feedback. It should look a little like this:

See? Asterisks for feedback in the terminal.

As always, thanks for reading. Feel free to sign up for the newsletter. The only emails you’ll get are notifications when there are new articles. I won’t even send you any spam, I pinky swear! Also, I think I’m going to settle on the Helvetica font. It’s pretty clear, easy to read, and easy to distinguish numerals from alphabetical characters. I should probably go back through my old articles and make this consistent, but it’s too much fun writing new articles!

Smash a Button
[Total: 0 Average: 0]
About Me: I'm just some retired dude with a little bit more free time on my hands. If you want to support the site, why not help yourself out too by ordering some inexpensive web hosting so that you can start your own site?


How To: Enable a Swapfile

Yeah, yeah… I have a modern, large SSD. I have more RAM than I’ll ever possibly use. I still want/enable swap, in this case a swapfile. Imagine my dismay when I installed Lubuntu 20.04 and found there’s no swap available during the basic installation? (It’s there in 21.04.)

See? There’s nothing there!

Sure, I could have made a swap partition during the installation, but that didn’t seem like something I wanted to do – besides, I can always add it later. Which, of course, I did.

There are all sorts of views about whether swap is required in my situation, or in any situation, but I’m of the mind that disk space is cheap and my computer is faster than I am. So, if it has any chance of helping, it’s all good. It should also be mentioned that swap is far more complicated than ‘a place where the kernel sticks stuff when there’s no more RAM left’. In fact, it’s a lot more complicated than that. It’s where the kernel pages content that’s seldom used, and it’ll happily use swap even when there’s plenty of RAM available.

Since it’s lacking, let’s learn how to add a swapfile to Ubuntu (and official flavors) 20.04 and presumably other similarly aged variants. It’s a pretty painless process. 

Like normal, let’s crack open your terminal emulator with CTRL + ALT + T.

Now, let’s check to see if you’ve already got some swap going on.

If it shows nothing but a new line, you have no swap. If it says anything else, you’ve got swap enabled already and probably don’t need this article.

Just so you know, I personally just did this a couple of days ago, after upgrading to Lubuntu 20.04. So, I’m pulling this data from .bash_history.

Let’s make a swapfile.

Why 8 gigabytes when I have ample RAM and an SSD? Because I never, ever want to worry about it again. I want to be able to open up every app I have and leave them open for a month. You do you and decide how big you want it to be!

Now, we need to set some permissions. We don’t want anyone writing to swap, we only want root writing to swap.

Next, we need to let the OS know that’s swap space.

And turn it on with:

And you now have swap in the form of a swapfile and it’s turned on. I suppose we should make this permanent. To do this, we need to edit fstab and nano is a good tool for this.

And add this at the bottom of that document:

Those are the 0 digit, in case the font here makes it confusing. (I think I’ll try messing with the fonts.)

Either way, you should now have a swapfile that gets loaded on reboot and is currently loaded and working. You can next edit the swappiness value. In Ubuntu, it is a default of 60. If you want to edit it, you’ll have to wait for another article.

Like always, thanks for reading. It’s missing at the moment, or not working, or I’d say subscribe and get notifications of new articles. However, I’ll have to work on that. I just haven’t made the time to do so.

Smash a Button
[Total: 0 Average: 0]
About Me: I'm just some retired dude with a little bit more free time on my hands. If you want to support the site, why not help yourself out too by ordering some inexpensive web hosting so that you can start your own site?


Linux Tips

This work is licensed under a Creative Commons Attribution 4.0 International License.
SITEMAP
Exit mobile version